 vs-picgo使用方法
# vs-picgo
# 使用 VSCode PicGo 插件 vs-picgo,简单快速搭建 Markdown 专用图床
# 安装配置
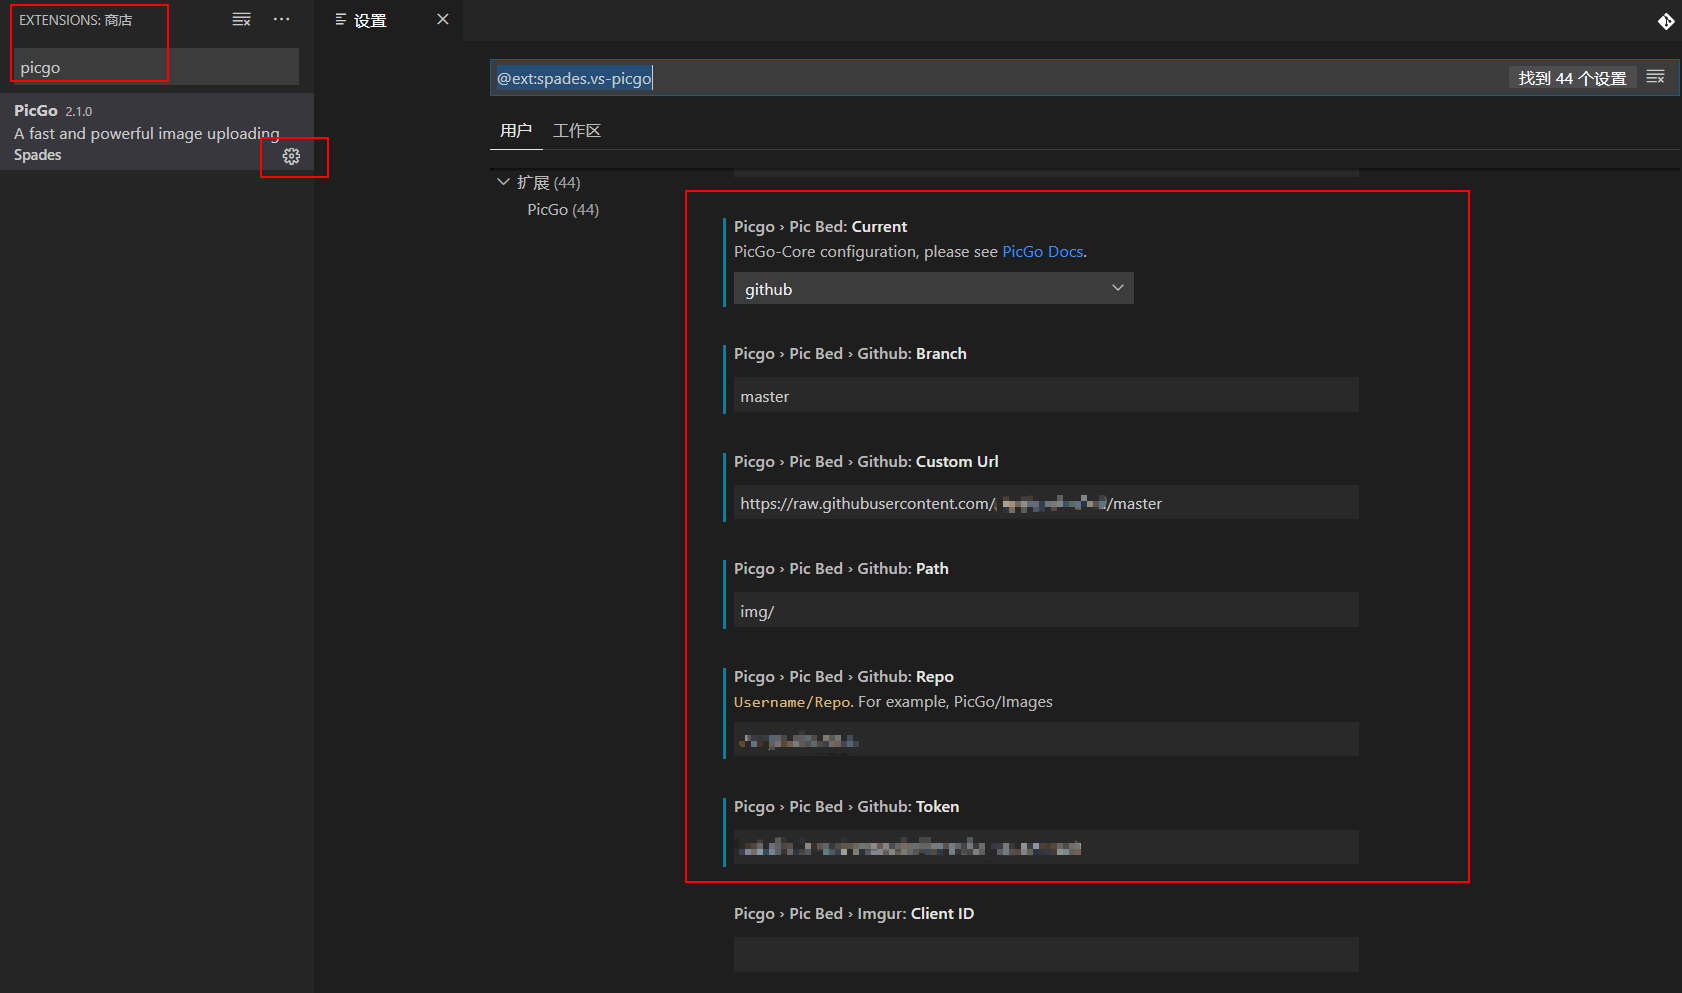
- 在VSCode
Extensions搜索vs-picgo安装,点击设置图标选择扩展设置进入设置项。 - 具体配置项如下,
current设置为github后,填写branch分支(默认为master),自定义URLcustomUrl填写后可生成图片markdown代码,path为仓库下图片存储路径,repo为仓库名,token在GitHub (opens new window)生成,点击Generate new toke勾选repo确认生成后留存备用。
{ "picgo.picBed.current": "github", "picgo.picBed.github.branch": "master", "picgo.picBed.github.customUrl": "https://raw.githubusercontent.com/用户名/仓库名/master", "picgo.picBed.github.path": "img/", "picgo.picBed.github.repo": "用户名/仓库名", "picgo.picBed.github.token": "xxx" }
# 使用方式
- 从剪贴板上传快捷键方式,Windows/Unix为
Ctrl + Alt + U,OsX为Cmd + Opt + U。 - 从资源管理器选择上传快捷键方式,Windows/Unix为
Ctrl + Alt + E,OsX为Cmd + Opt + E。 - 输入本地资源地址上传快捷键方式,Windows/Unix为
Ctrl + Alt + O,OsX为Cmd + Opt + O。 - 以上三种方式上传时,若选中文本则以选中文本为上传文件名。
# 注意
- 若无法访问
https://raw.githubusercontent.com,则需要修改hosts文件,复制hosts文件后添加199.232.4.133 raw.githubusercontent.com行,再覆盖到C:\Windows\System32\drivers\etc下。 - 可参考PicGo 配置手册 (opens new window)